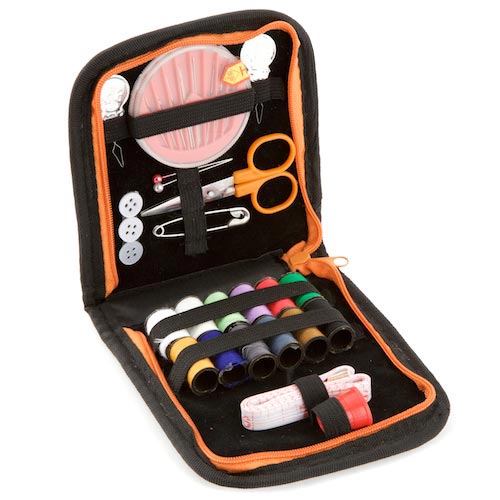
This might look tempting, but I’d advise against an ‘all in one’ sewing kit. You can have much better quality buying tools separately
Good Afternoon to you Sorcerers, Spies and Seamstresses, Traitors, Tyrants and Tailors. I’m writing for a magazine called ‘Seaxe’. It’s for hobbyists of the re-enacting, history and larp persuasion- which is probably why you’re here.
If you’re learning to sew by hand and aren’t confident, I’ve prepared this blog to cover the basics; threading a needle, casting on and off, right/ wrong sides and basic stitches. In a series of articles in Seaxe magazine, I hope to teach you how to repair and make your own kit. Some of you might not know where to start, and that’s where I come in.
Sewing is an inexpensive hobby. I’ve saved a lot of money being able to make items of costume myself, rather than paying others. Cloaks, tunics or a mask, just require a little knowledge of how to put them together and the right tools.
Equipment
You don’t need to spend a lot to get a basic sewing kit, but there are a few essentials. 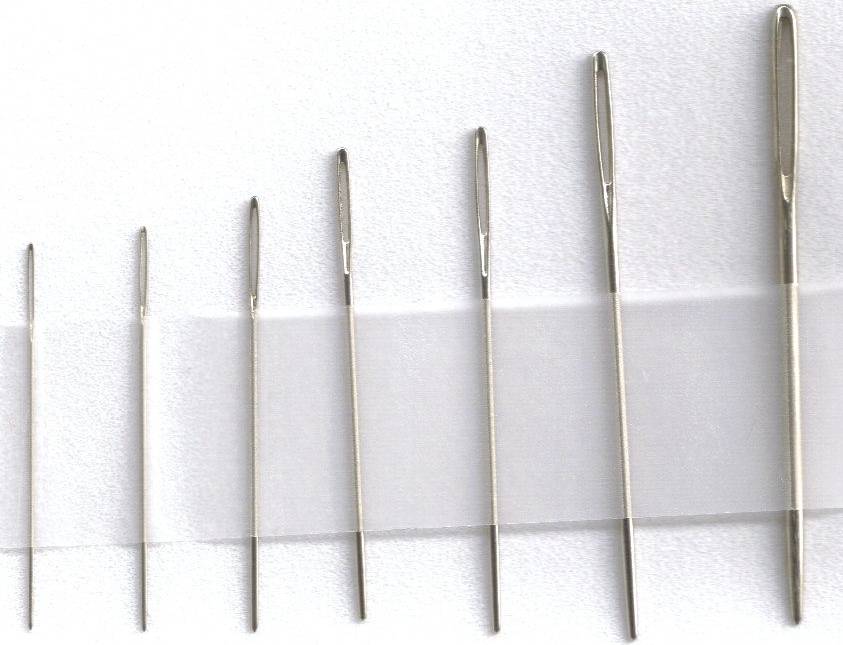
Needles– sewing, wool, sturdier ones for leather work. There are different types of needle, depending on what fabric or thread you’re using. I’d recommend getting one or two large ‘wool’ needles, and a variety of ‘normal’ sewing needles.
 Scissors– A small pair of sharp scissors for cutting threads and closely working with fabric are essential. A pair of large, fabric scissors will help with cutting out large pieces of fabric. Fabric scissors have a flattened handle to help you glide along a table or surface.
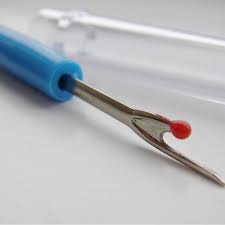
Known as ‘Ripper’ to his friends
Stitch ripper– A tool for mistakes. It’s a small piece of metal curved with a sharp edge to pick up and cut stitches. I use mine a LOT. Just be careful not to cut threads of the fabric, only your work.
Pins– Hopefully a ‘one time’ expense. Pins hold pieces of fabric together while you work. A magnet would be good too- I’m always dropping pins… and standing on them.
A measuring tape– Often made of fabric or plastic, they’re much better than a ruler when working with fabric.
Thread– Rather than buying a cheap set of threads, I would suggest buying a few good quality reels of black, white and red. Then purchase other colours as you need them. Cheap thread is weak thread, and will snap while you work, and while you’re wearing your creations.
Buttons– Not an absolute essential, but its good to collect them from when they fall off, or the extra ones you’re given sewn onto the labels of garments.
-
Right side, Wrong side
 If you look at a dress maker’s pattern you’ll see they refer to sides of a piece of fabric. They just mean which side is the front, or back of the fabric. With coloured cotton, the sides may look exactly the same, in which case it doesn’t matter. But with heavier fabric, with designs woven in, you may need to decide which side you want to be visible.
Always look at the fabric in good light. Wait until the morning if you’re having difficulty seeing the difference. Once you’ve worked out the right and wrong sides put a pin in a scrap piece of the fabric, with the pin head on the ‘right side’. Just in case you forget.
When you are sewing pieces of fabric together, you must always be sewing on the ‘wrong side’, so that your stitching doesn’t show. This will also hide any seams or messy casting on or off.
-
Casting on and off
Casting On
This is what we call connecting the thread to the material so that it cannot unravel. First you thread the needle.
- Choose the needle suitable to the type of fabric and thread you want to use. If you’re stitching with thread a ‘normal’ needle will do, but if you’re stitching on leather, it will be hard work for your hands. If you’re sewing on cotton with woollen thread, the wool will never get through the eye of the needle, so you’ll require one with a larger ‘eye’.
- Cut a length of thread twice the length of your wrist to your elbow. This is the furthest length you can pull your thread. Any longer, and you’re likely to get knotted up a lot.
- Smooth the end of the thread between your thumb and forefinger, twisting it slightly.
- Push the thread through the eye of the needle. This may take several tries. If the thread frays a little, cut a centimetre off and try again.
- Fold the thread in half, with the needle in the middle and knot the ends together.
Fastening Off
Always fasten off on the wrong side of the fabric.
- When you begin to run out of thread, make a few small stitches in the fabric.
- Go over your last stitch a few times and push the needle underneath it. The stitches form a bridge, which your needle underneath it.
- Run the needle underneath the previous stitches for about a centimetre and cut off from there.
Basic Stitches
I rarely use any other stitches. Each of these serves a different purpose, and can be used for different things. I went on a hunt for online resources, to better illustrate how to do these stitches.
- Straight stitch
Used for sewing seams together, this is the mother of all stitches. Master it, so that you can make neat rows of stitches, and you’re doing really well. Here’s a little something from the experts of experts village:
…and because its difficult to see the finished stitches, here’s a tutorial: http://lbbtipstitchesstraight.blogspot.co.uk/
- Blanket stitch
This is used to re-enforce the edges of fabrics, and even stitch multiple layers together at once. It’s also very popular as decoration around blanket edges.
- Chain stitch
This is an embroidery stitch, purely for decoration. I use it to form words, lines or images on my fabric. It’s a little more complicated that straight or blanket stitch, but be patient with it.
Thank you for reading, I hope this helps with your sewing. If you have any questions or tutorials you’d like to request, please leave a reply.
